
articulated grabber
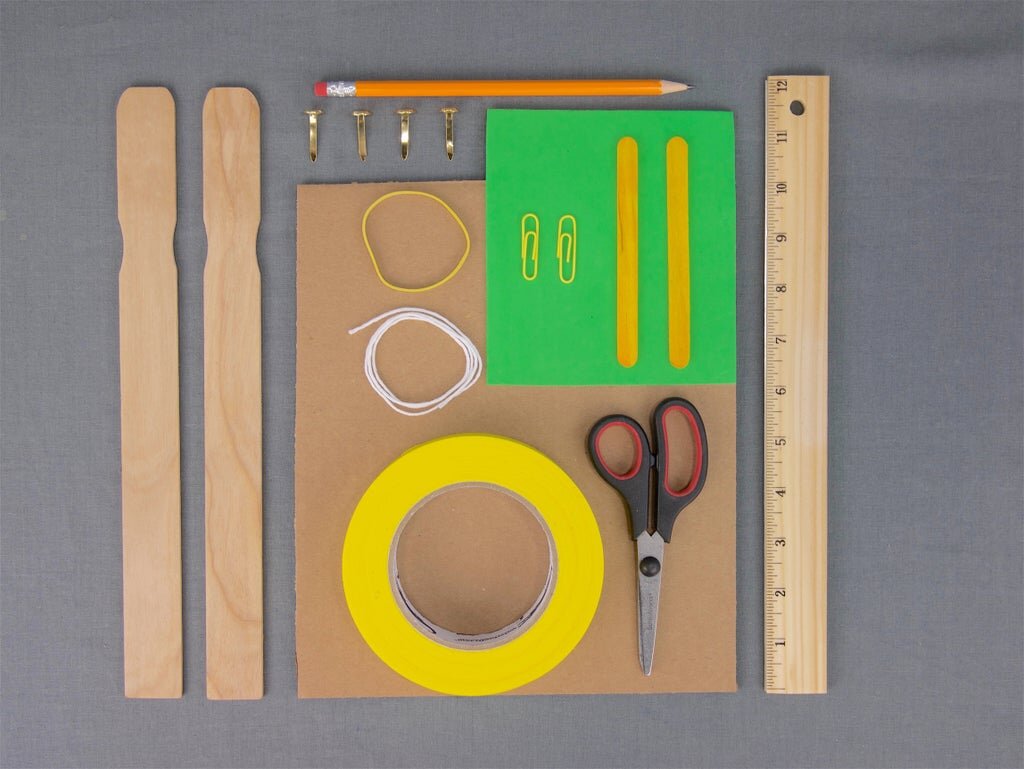
Materials needed:
Clean and unbent cardboard
Ruler
Scissors
Sharpened pencil
Masking tape
1.5” metal fasteners
⅛” x 3.5” rubber band
String
Craft sticks, foam, paperclips, or other materials to improve grip
Assorted objects to pick up
Steps:
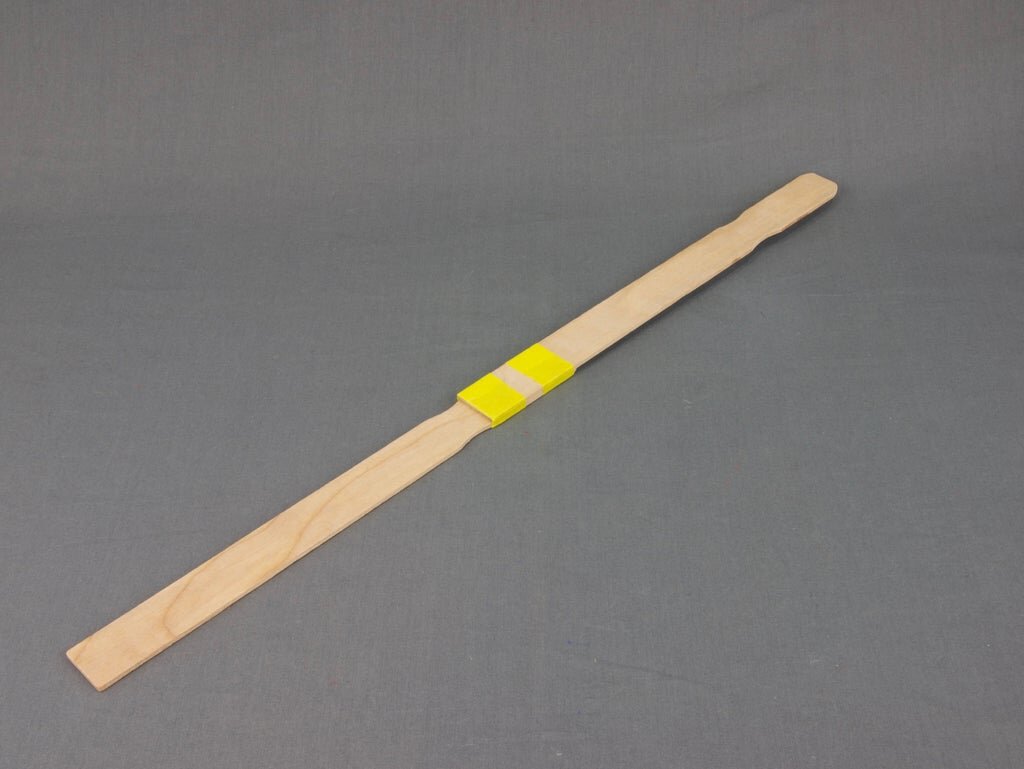
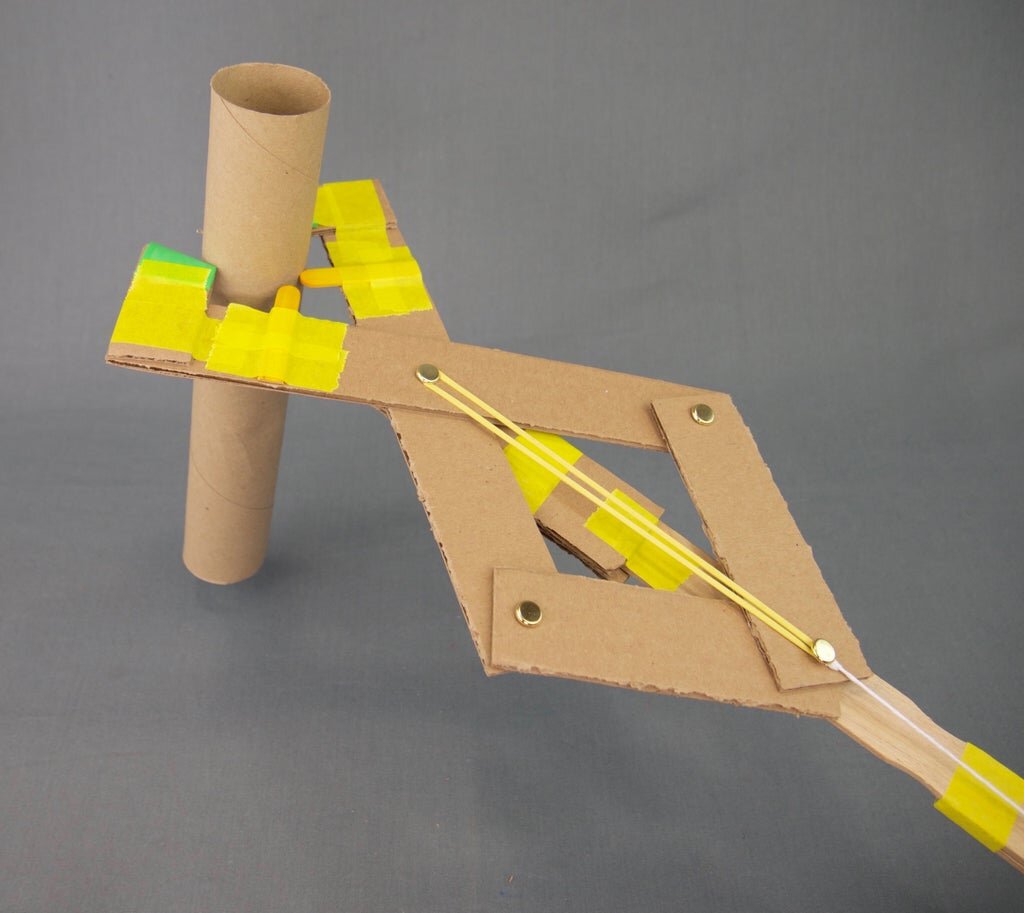
Overlap the paint stirrer by about 4” and wrap tightly with masking tape in at least two places to make the handle.
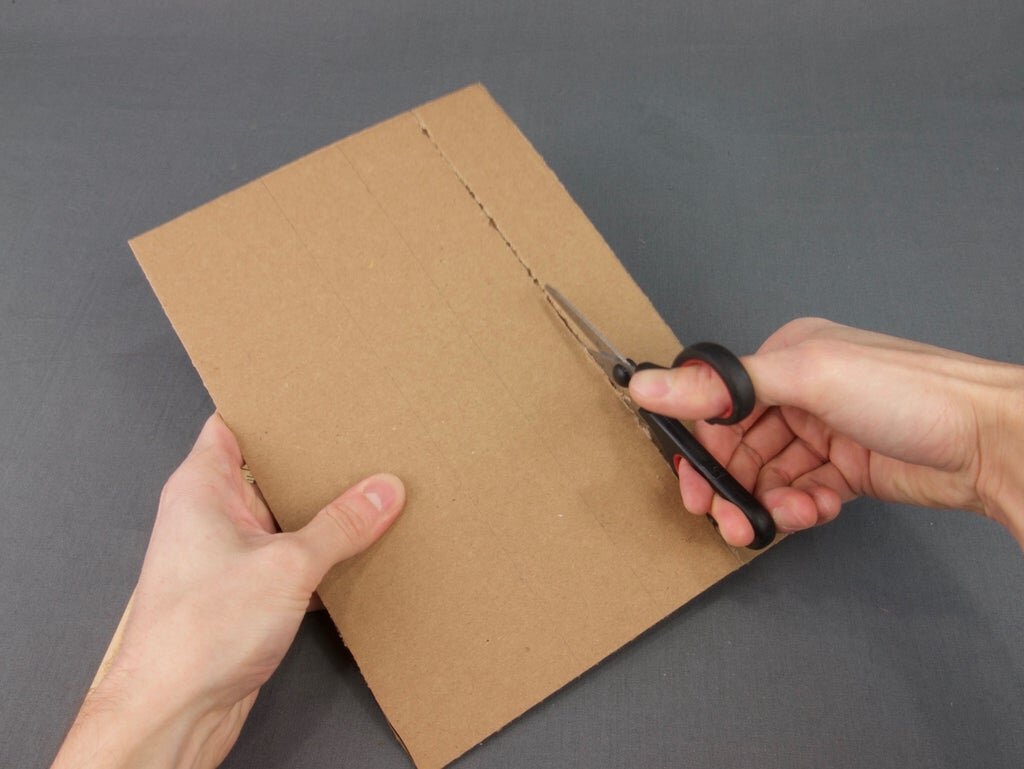
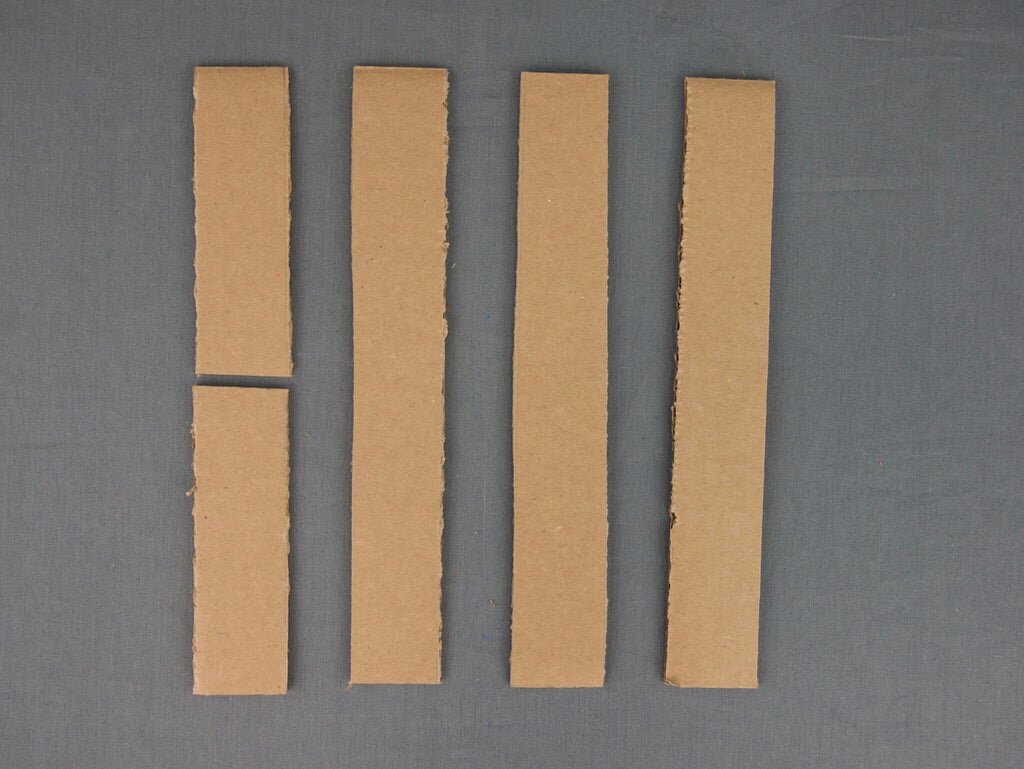
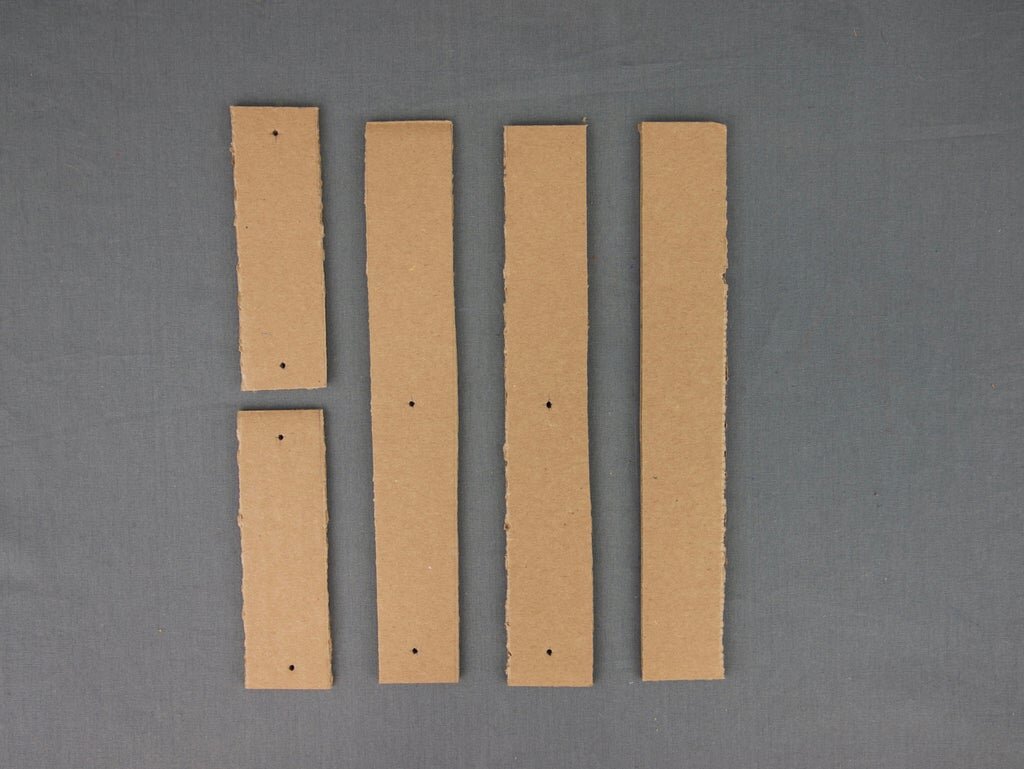
Cut 10” pieces of cardboard that are about 1.5” wide. Each grabber needs three 10” and two 5” pieces.
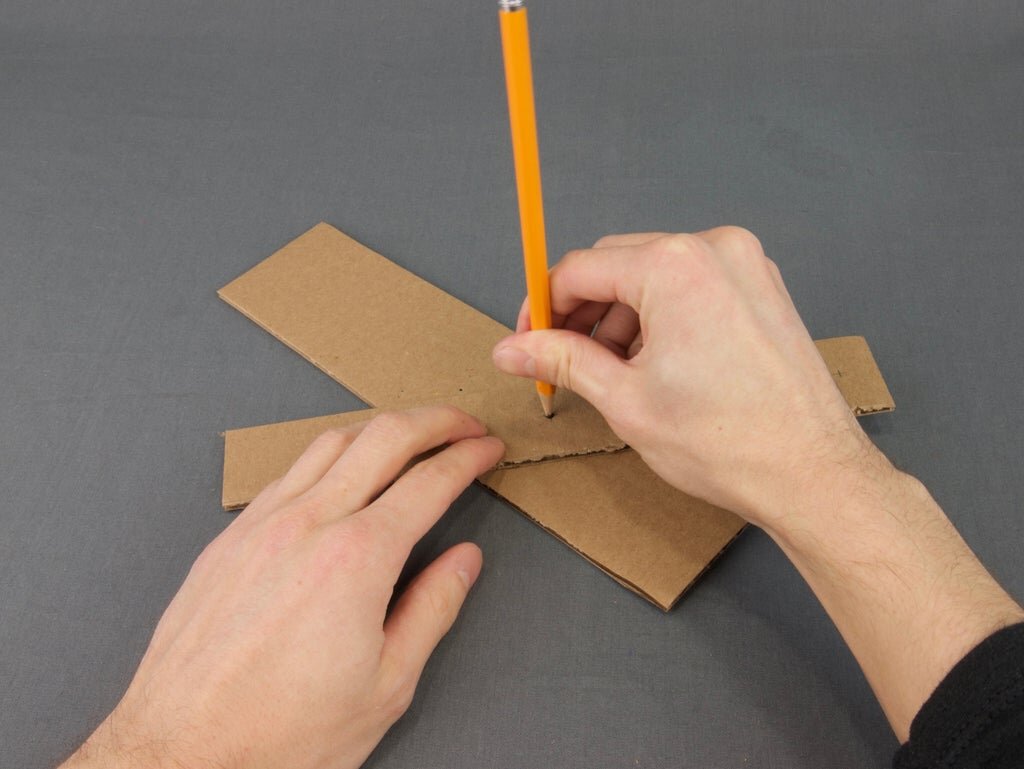
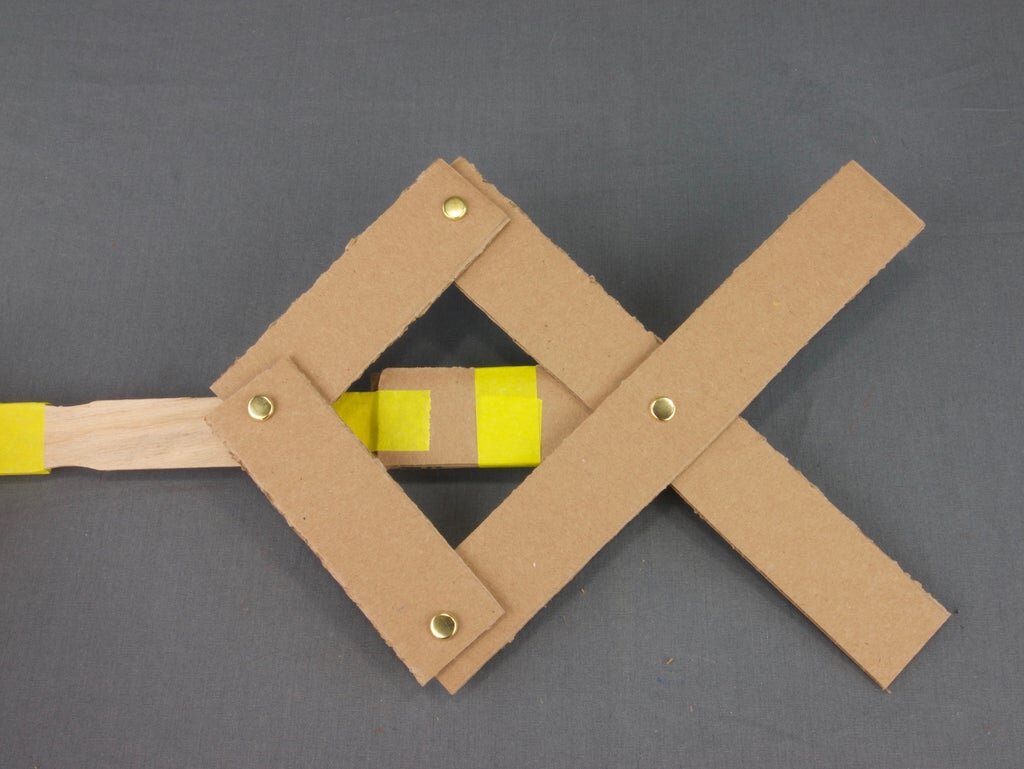
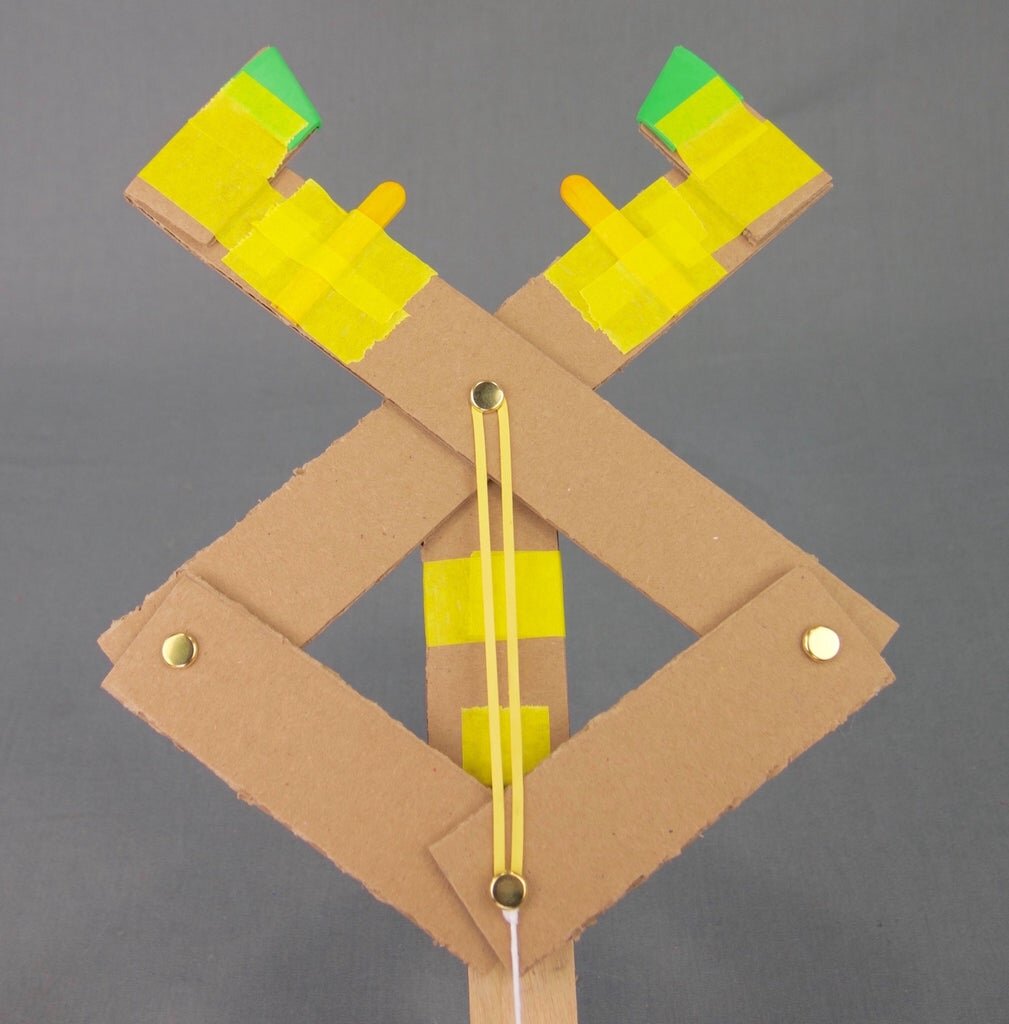
Use a sharpened pencil to poke hinge holes into the cardboard as shown. The holes should be at least ½” from the edges and they don’t need to be very big. Note that one piece isn’t poked at all.
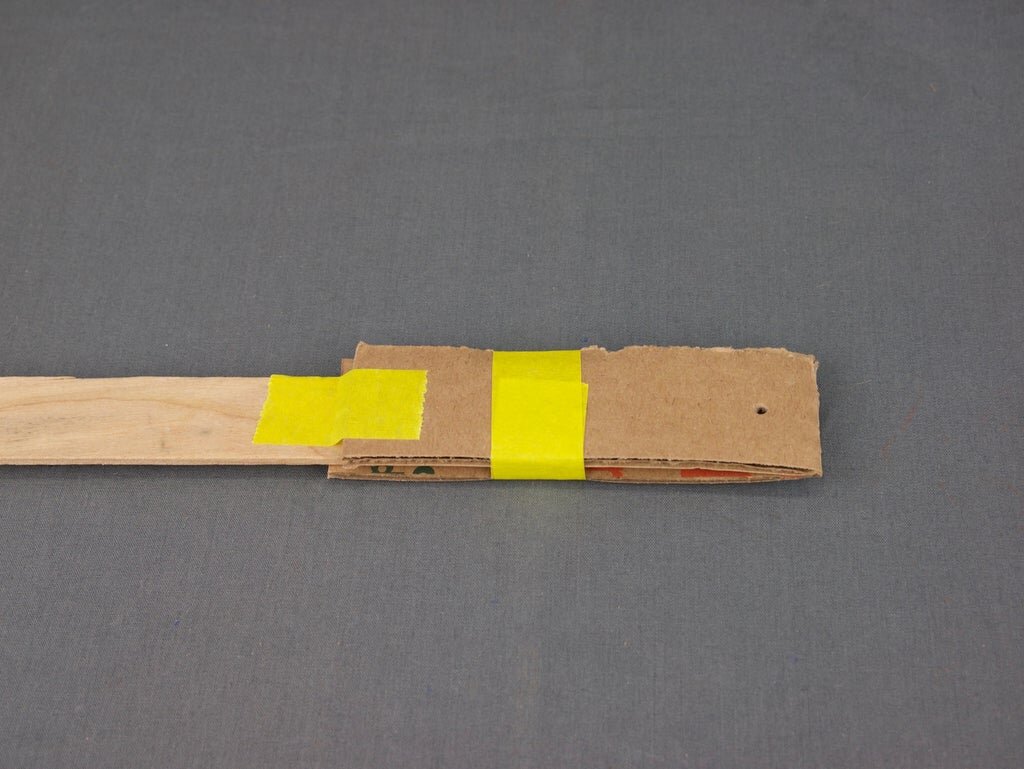
Take the piece that does not have holes, and bend it in half and tape it into the end of the handle as shown. Overlap most of it with the handle, but leave about 1” of the folded side not overlapped with the wood. Poke a hole through that part of the cardboard.
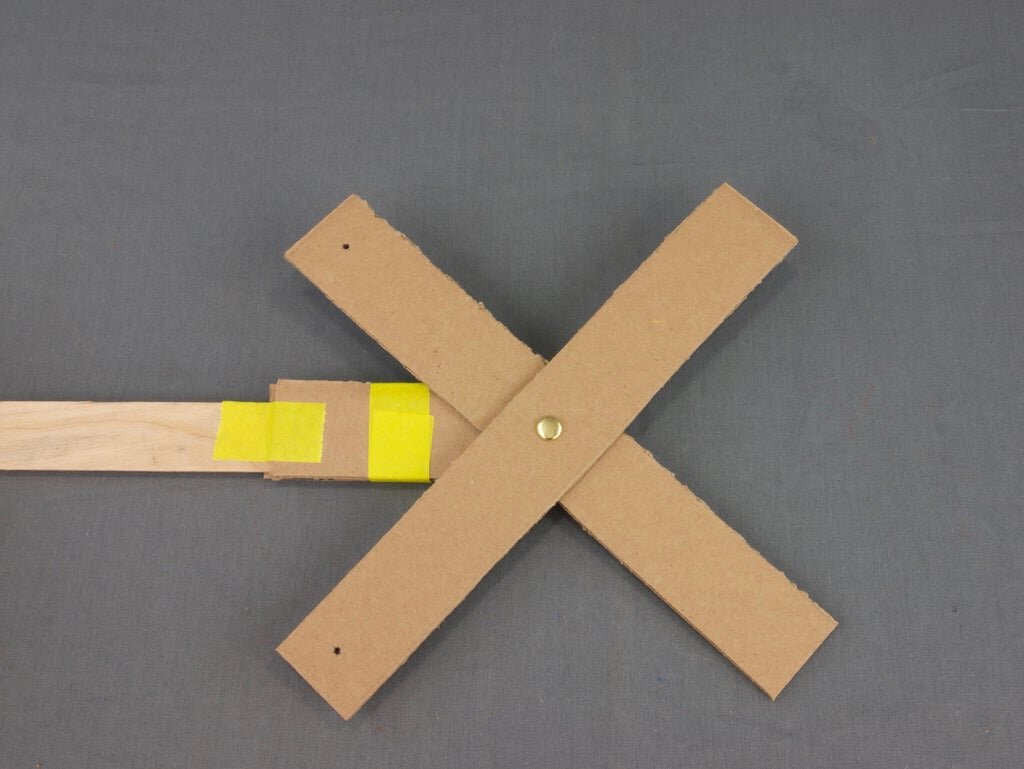
Assemble to the cardboard as shown using a metal fastener. On the other side, fold the faster tabs completely flat, and secure in place with a piece of tape.
Attach the two 5” pieces as shown. Remember to fold and tape the faster tabs.
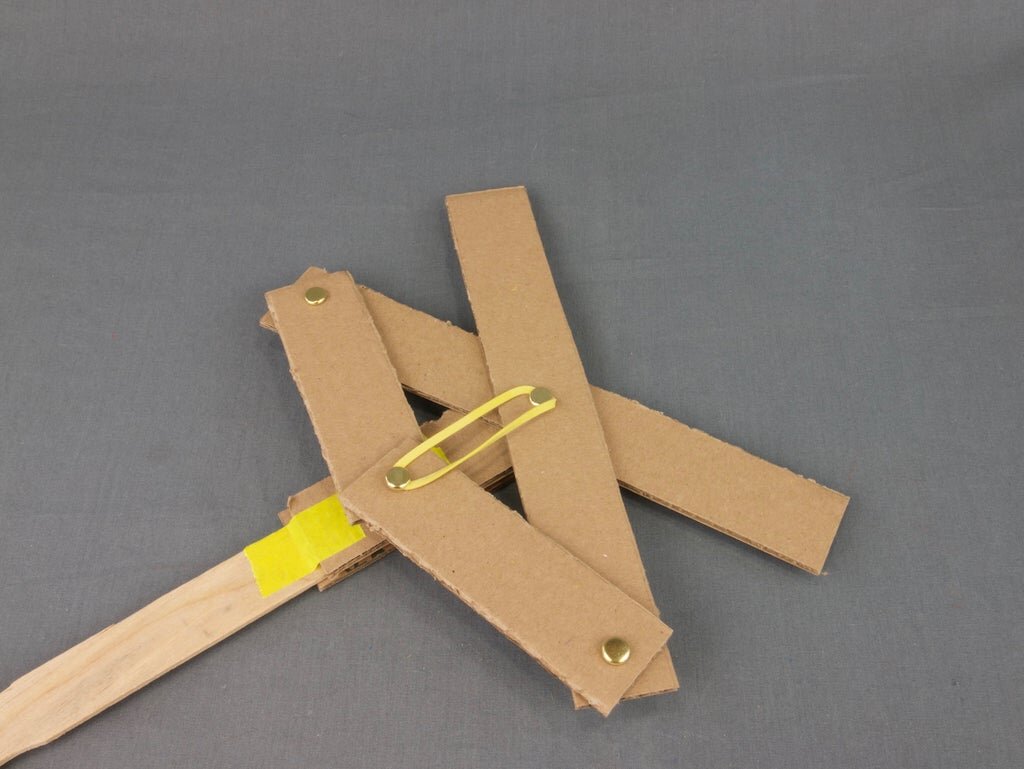
Attach the rubber band by stretching it with both hands and slipping it under the middle fastener as shown, then repeat with the other middle fastener.
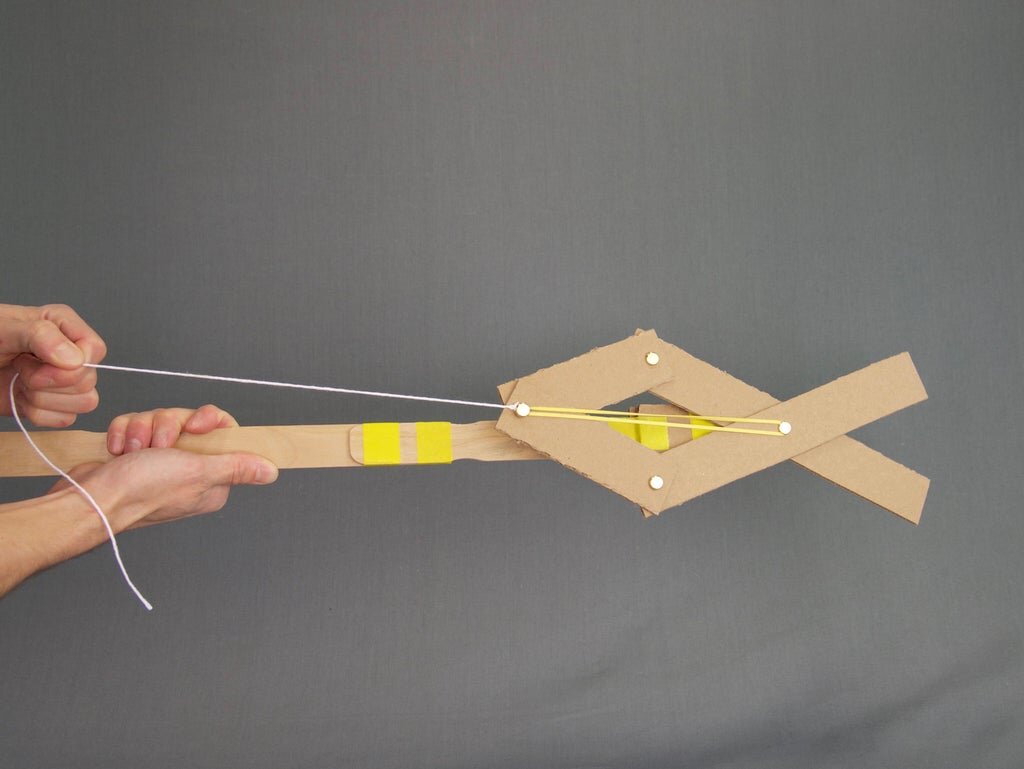
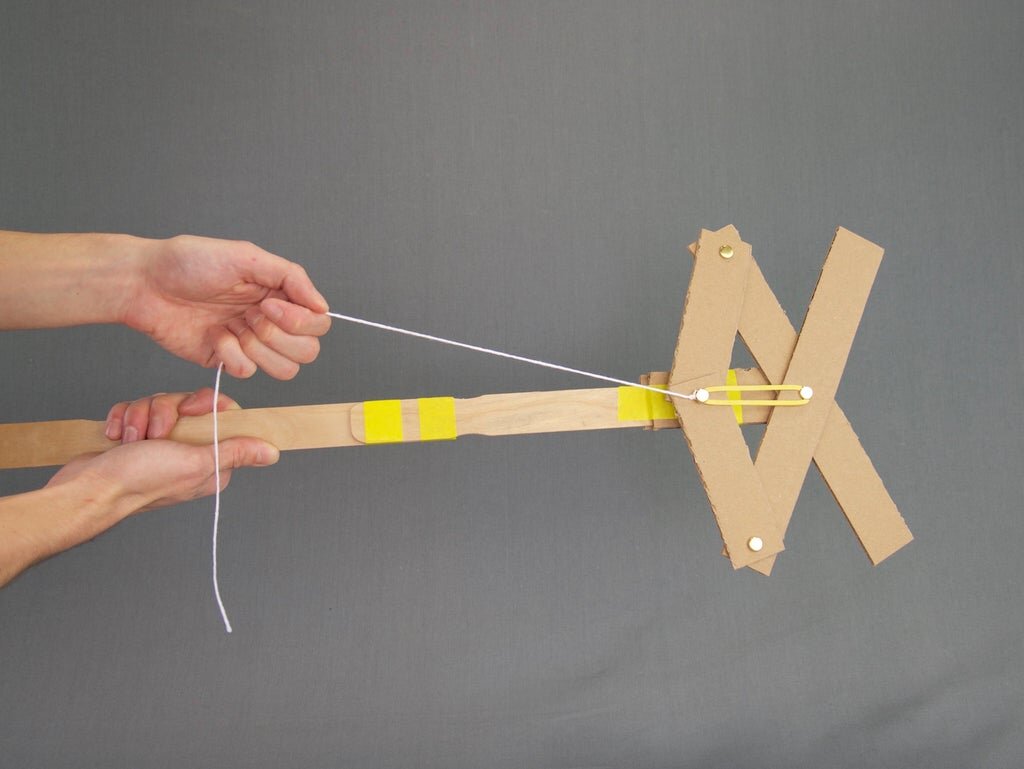
Tie a piece of string to the fastener as shown. The grabber is ready to test! Give the string a tug, and your grabber should close.
You can improve the grabber grip by using your available materials. One example is using wooden craft sticks and taping them to the end of the grabber.
If you have any more questions, feel free to DM us!